Operations procedures for KYC Users
User Guide describes the main steps of the Applicants’ verification process through the Know Your Customer (hereinafter- KYC) Procedure.
Below there is a step-by-step guide on how to pass KYC with the main stages of validation process and the description of the most common mistakes – everything to help Applicants to pass KYC procedure as quickly and simply as possible.
1. Step 1
An Applicant log in to the AIFC Self-Service portal, starts the procedure of verification, and chooses one of the verification scenarios by pressing the appropriate button, "proceed with KYC now" or "Send an e-mail to individual to go through KYC". In the second scenario, the Applicant uses the link in the e-mail, if he/she was invited by authorization personal of the Applicant.
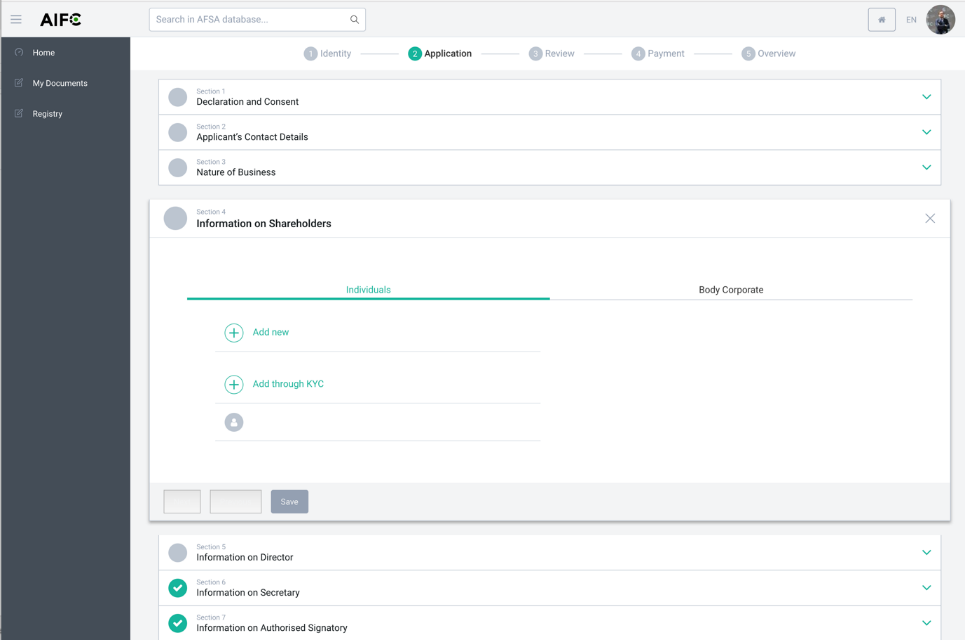 Figure 1. SSP portal
2. Step 2
The Applicant clicks “Proceed with KYC” button and follows the instructions on the screen.
First, the Applicant has to review, check, and accept privacy terms and gives a consent to process his personal data.
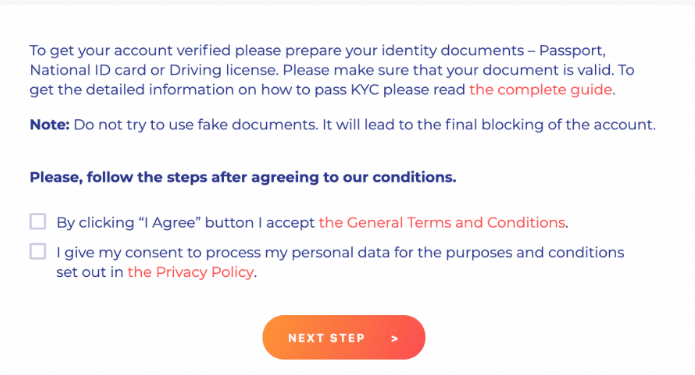 Figure 2. Privacy terms and personal data agreement page
3. Step 3
The system redirects the Applicant to the next stage, where it is necessary to choose the country of residence. After choosing the country, the KYC system opens the appropriate window with the request of uploading corresponded type of the document. After taking a photo of the document, the Applicant uploads a picture of the document, using the forms below.
First, the Applicant chooses his/her country:
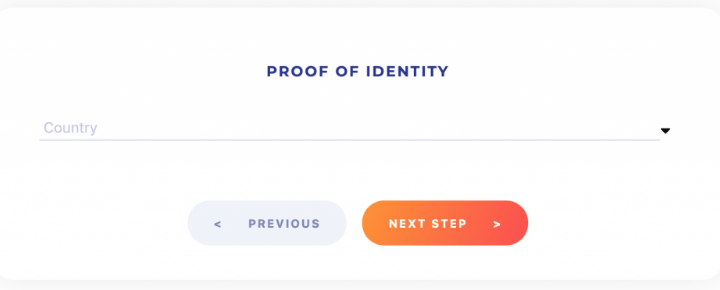 Figure 3. Country choose page
Then, the Applicant uploads a photo of his Passport.
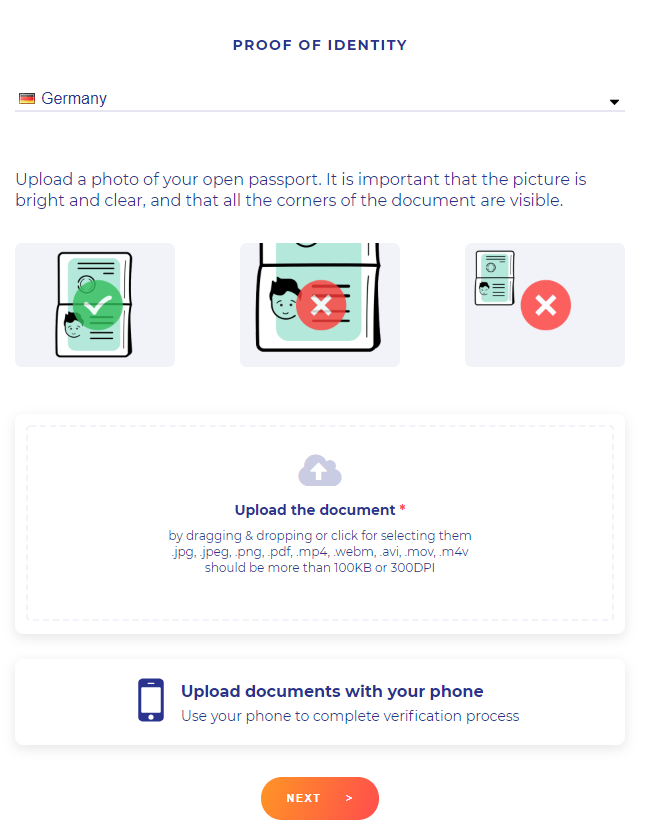 Figure 4. Document uploading page
Important KYC rule for Kazakhstan citizens:
Kazakhstan citizens can choose type of ID document: ID card or Passport.
 Figure 5. Option for Kazakhstan citizens only
If you choose an ID card, you have to provide a photo of both sides of your ID-Card.
 Figure 6. ID-Card uploading page for Kazakhstan citizens only
If you choose a Passport, you have to provide the first page of your Passport.
 Figure 7. Passport uploading page for Kazakhstan citizens only
What is important to note when the Applicant takes a photo or scan:
- All corners of the document should be visible in the photo;
- The text in the document should be easy to read. Make sure there are no highlights and stains on the photo. Low quality pictures won’t be accepted by the system;
- If Applicant document has two pages or two sides (for example, a US ID-card or a CIS passport), both sides / pages must be attached;
- The document must be valid for at least a month. An expired document won’t be validated;
- The system doesn’t accept documents corrected in the graphic editors;
- KYC accepts JPEG or PDF files no less than 500 KB;
- In some cases, the document has to have Latin transliteration as the system doesn’t accept Arabic ligature;
Please note:
If the above rules are not applied, the system can reject your application.
4. Step 4
Further, the Applicant needs to make his/her selfie picture with the same document. That’s how KYC can confirm that the document belongs to its owner. At this stage, the system will not accept a photo of the document without the owner in the same picture with it.
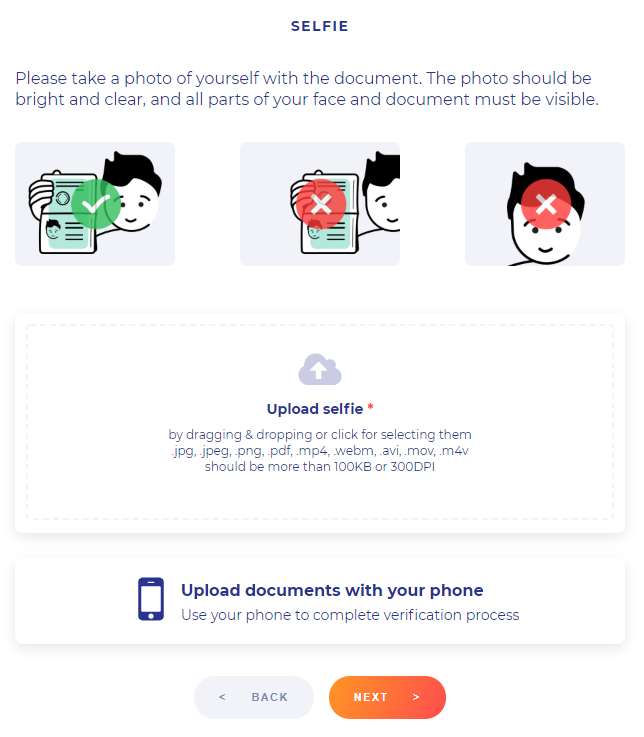 Figure 8. Selfie uploading page
Important:
- The Applicant’s face should be visible both, on the selfie and on the photo on the document, so that the algorithm can correctly identify the features.
- The photo must be of decent quality so that the text on the document is readable.
The KYC system also requires you to complete additional proof of your identity with a face capture procedure to complete the identification process.
Click “Start”, watch the video instruction of the process, and follow instructions on the screen to complete the identification process.
 Figure 9. Face capture page
5. Step 5
When all information is submitted, the KYC system kindly asks the Applicant to check it one more time for correctness.
If everything is correct, the only thing left is to wait for KYC’s approval.
 Figure 10. KYC waiting page
The Applicant has to be sure that his/her profile data corresponds with the submitted documents that are visible to avoid issues.
Otherwise, the Applicant’s application will be declined.
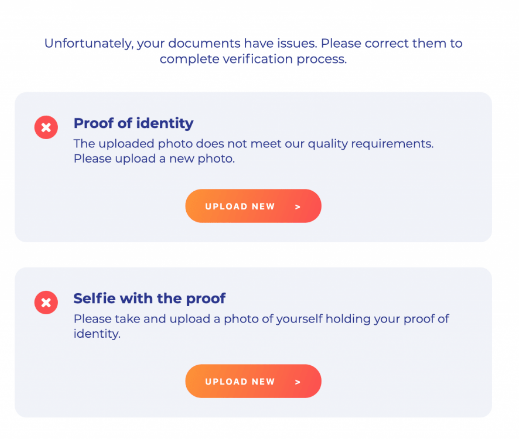 Figure 11. Applicant’s documents reuploading page
6. Step 6
When the verification process is finished, the Applicant will be redirected to digitalresident.kz, the necessary data from Applicant's document will be extracted automatically.